Learn a clever stitching technique that will give old clothes a new lease of life
Mending is officially good for you. Not only does it make you feel useful and give you the warm glow of knowing you’ve saved something from landfill, but it also lets you make an item of clothing unique with visible mending that brings character to everyday items. A mended item becomes even more beautiful and loved than before it had flaws.
Satin stitch patching
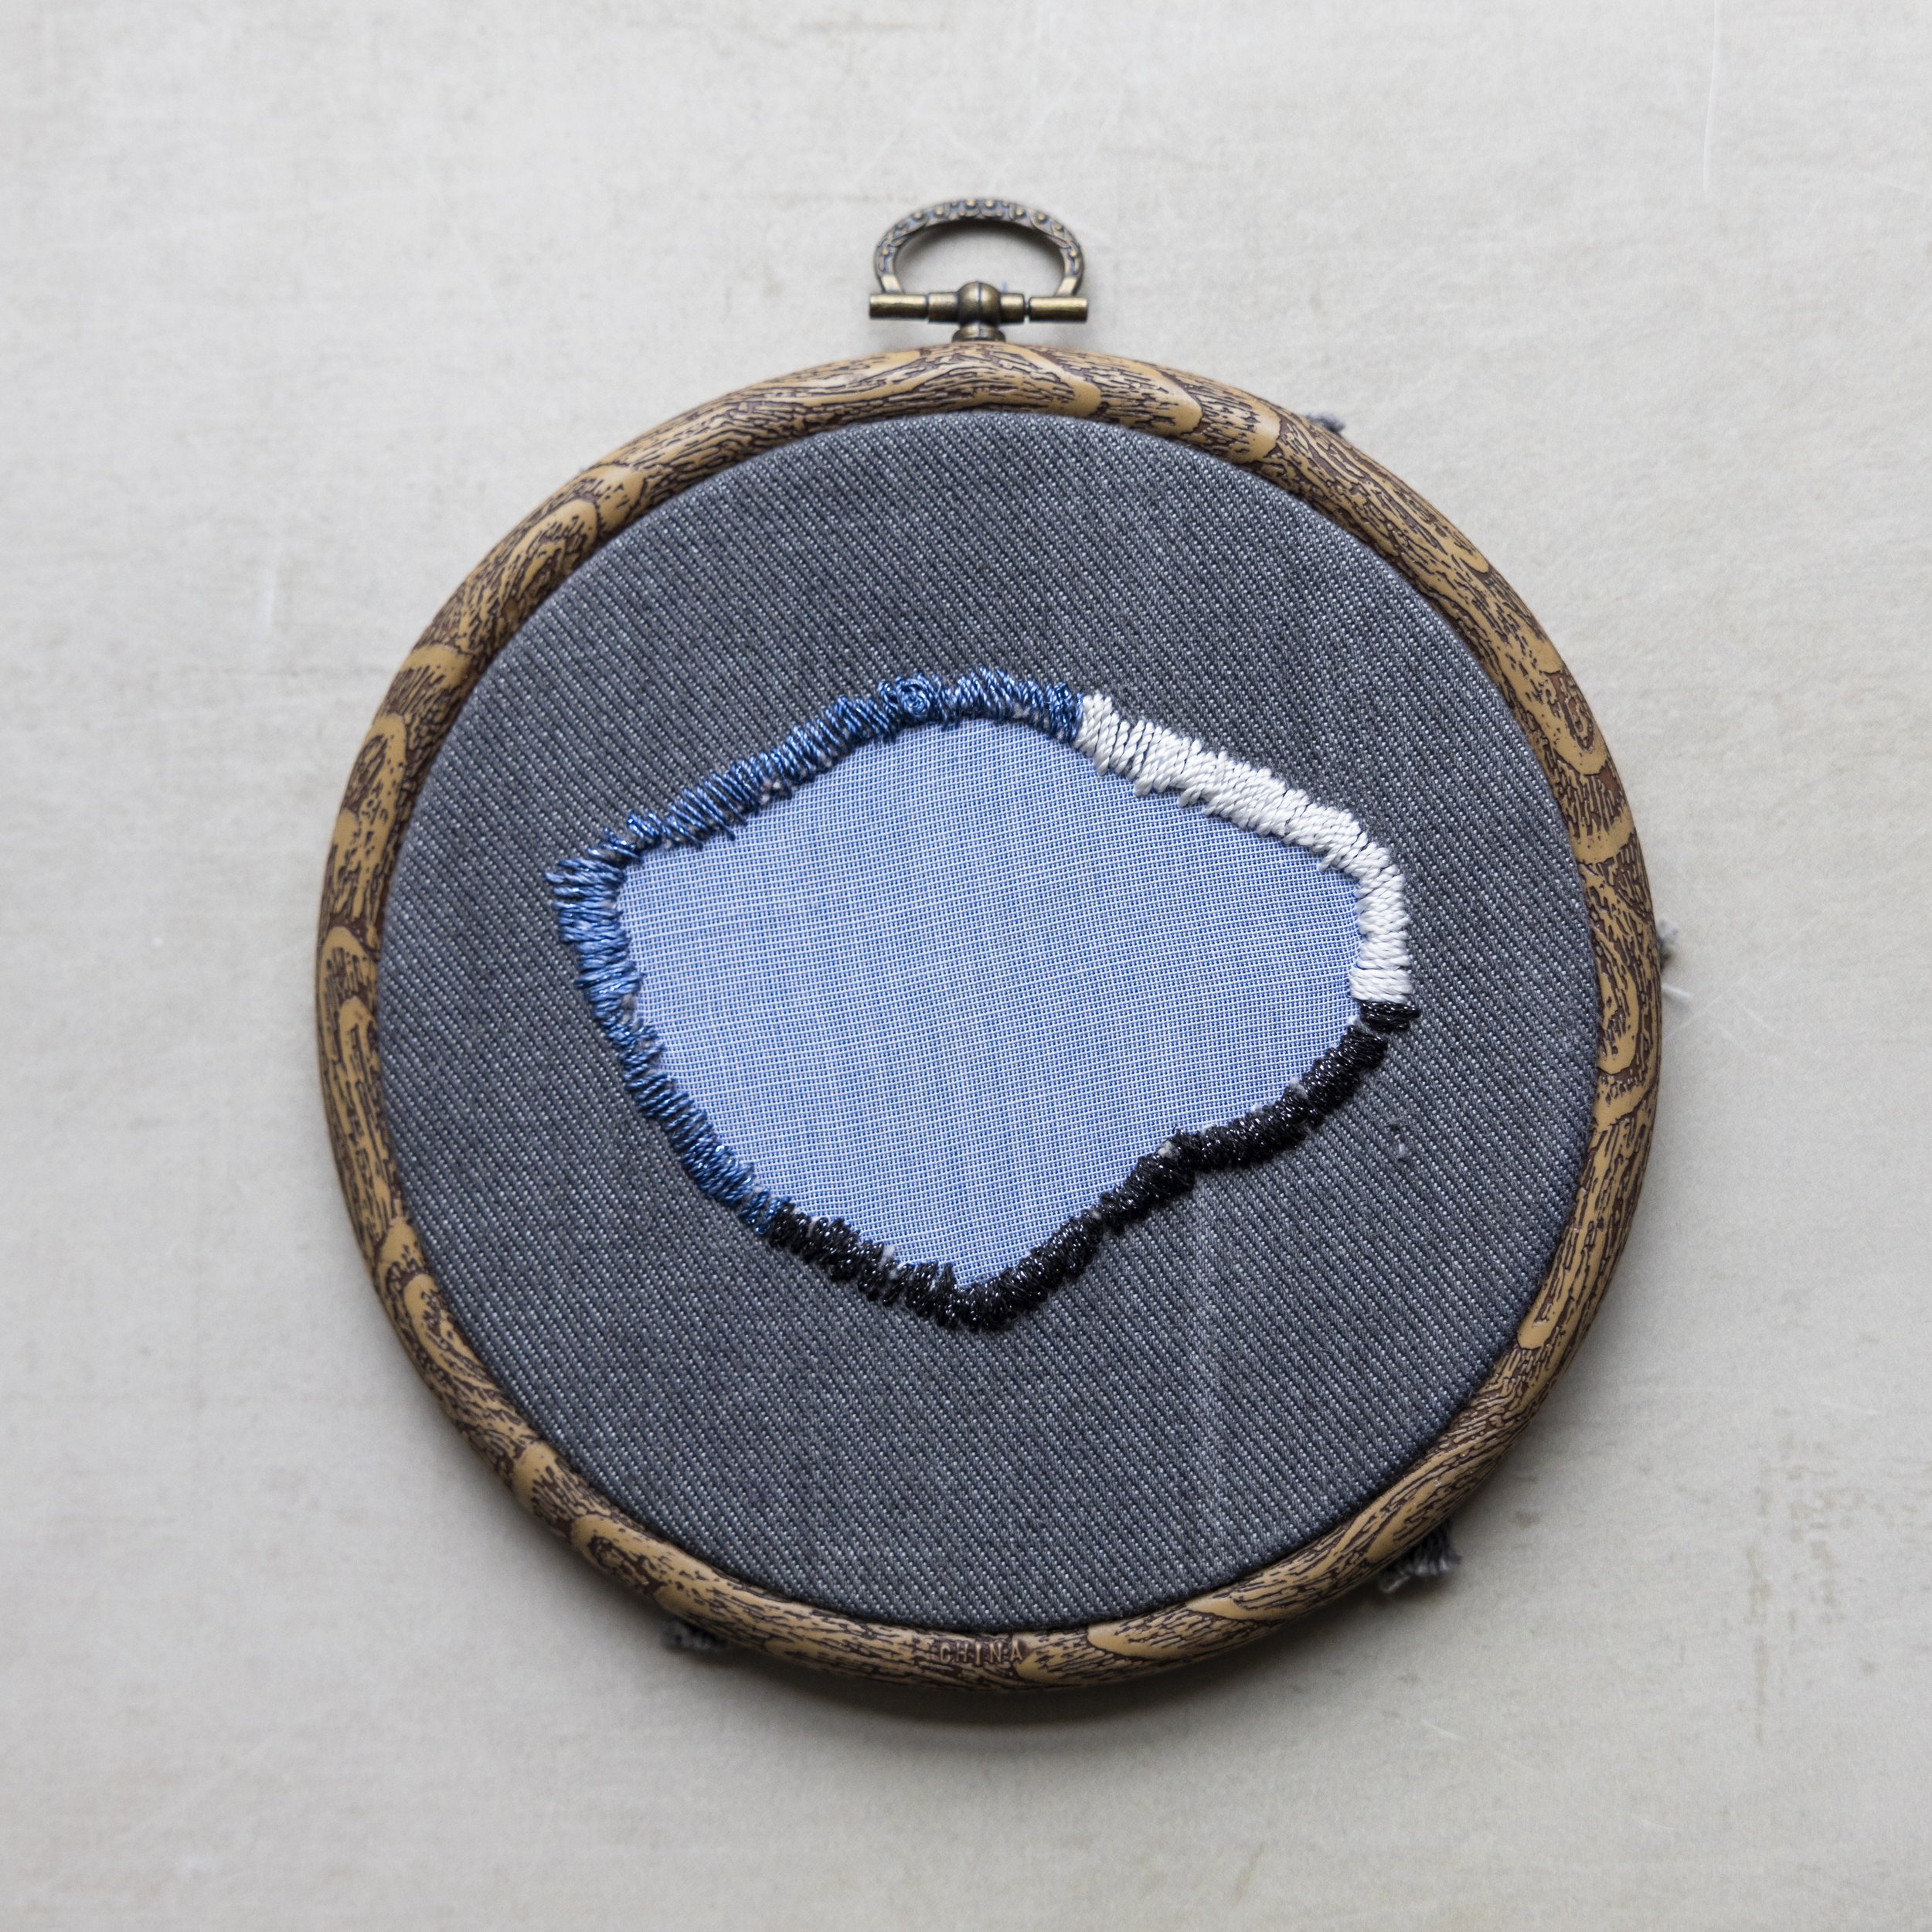
Satin stitch is a great way to make a feature out of a mend and this works particularly well on fabrics like denim It’s used to patch the fabric hole to reinforce the mend and stop it getting any bigger. Traditionally, cotton threads are used, but it can also work nicely with silk threads.
1 Select a piece of scrap fabric large enough to patch the hole in the garment – you can always trim it later. Any woven fabric will work, just make sure it has the same density as the garment you want to repair. Next, you may want to make the hole a bit more interesting – take a fabric pen and draw a shape around the hole and trim to the new shape you’ve drawn.
2 Pin your patch to the inside of the garment so the hole is covered. Be generous with pinning – you don’t want the fabric patch to move about while you’re stitching. Pin around 0.5cm from the edge of the hole.
3 Thread your needle (use an arm’s length), leaving a tail by the eye end so the thread doesn’t come out. Then tie a couple of knots at the opposite end of the thread.
4 To start your satin stitch, come through the back of the fabric at the very edge of where the hole is in the garment. Bring your needle all the way through until the knot meets the fabric. You’ll then put the needle back into the fabric from the front, positioning your needle about 5mm directly below where you brought the needle out. Next, bring the needle through the back again (almost back through the first hole in the first stitch, so the stitches are super close to one another), and then through the front, again super close to the previous stitch. Continue in this way until you come to the end of your thread and are ready to thread the needle again.
5 When tying off your thread, you’ll need to leave at least 10cm of thread to make it secure. Bring your needle through to the back, through the stitch that’s closest to where the needle is coming from. Pull the needle through about 1 cm and wrap the thread around a couple of times and pull through. This creates the knot. I like to then weave the needle under the next two stitches and repeat this process one more time to make sure the thread won’t come loose when washed. You can then take your scissors and snip really close to the garment.
6 Continue with a new piece of thread ensuring that your stitches are super compact – much like satin fabric – going all the way around the hole until you meet your starting point. Tie off your work, and give it a press to make sure the fabric is laying flat. You’re now ready to wear.
This is just one of the projects from mending expert Hannah Porter who put together our March issue’s Home Economics pages. To find out more about Hannah’s work, workshops and kits visit: restorationldn.com.
Buy this month's The Simple Things - buy, download or subscribe