The Simple Things

Taking time to live well
  • Home
  • Subscribe
  • SHOP
  • Newsletter
  • About
  • Work with us
  • Home
  • Subscribe
  • SHOP
  • Newsletter
  • About
  • Work with us

Blog

Taking Time to Live Well

  • All
  • Chalkboard
  • Christmas
  • Competition
  • could do
  • Eating
  • Escape
  • Escaping
  • Fresh
  • Fun
  • gardening
  • Gathered
  • Gathering
  • Growing
  • Haikus
  • Interview
  • Living
  • Looking back
  • Magazine
  • magical creatures
  • Making
  • Miscellany
  • My Neighbourhood
  • Nature
  • Nest
  • Nesting
  • outing
  • playlist
  • Reader event
  • Reader offer
  • Shop
  • Sponsored post
  • Sunday Best
  • Think
  • Uncategorized
  • Wellbeing
  • Wisdom

Recipe: Pitta bread

Lottie Storey October 7, 2016

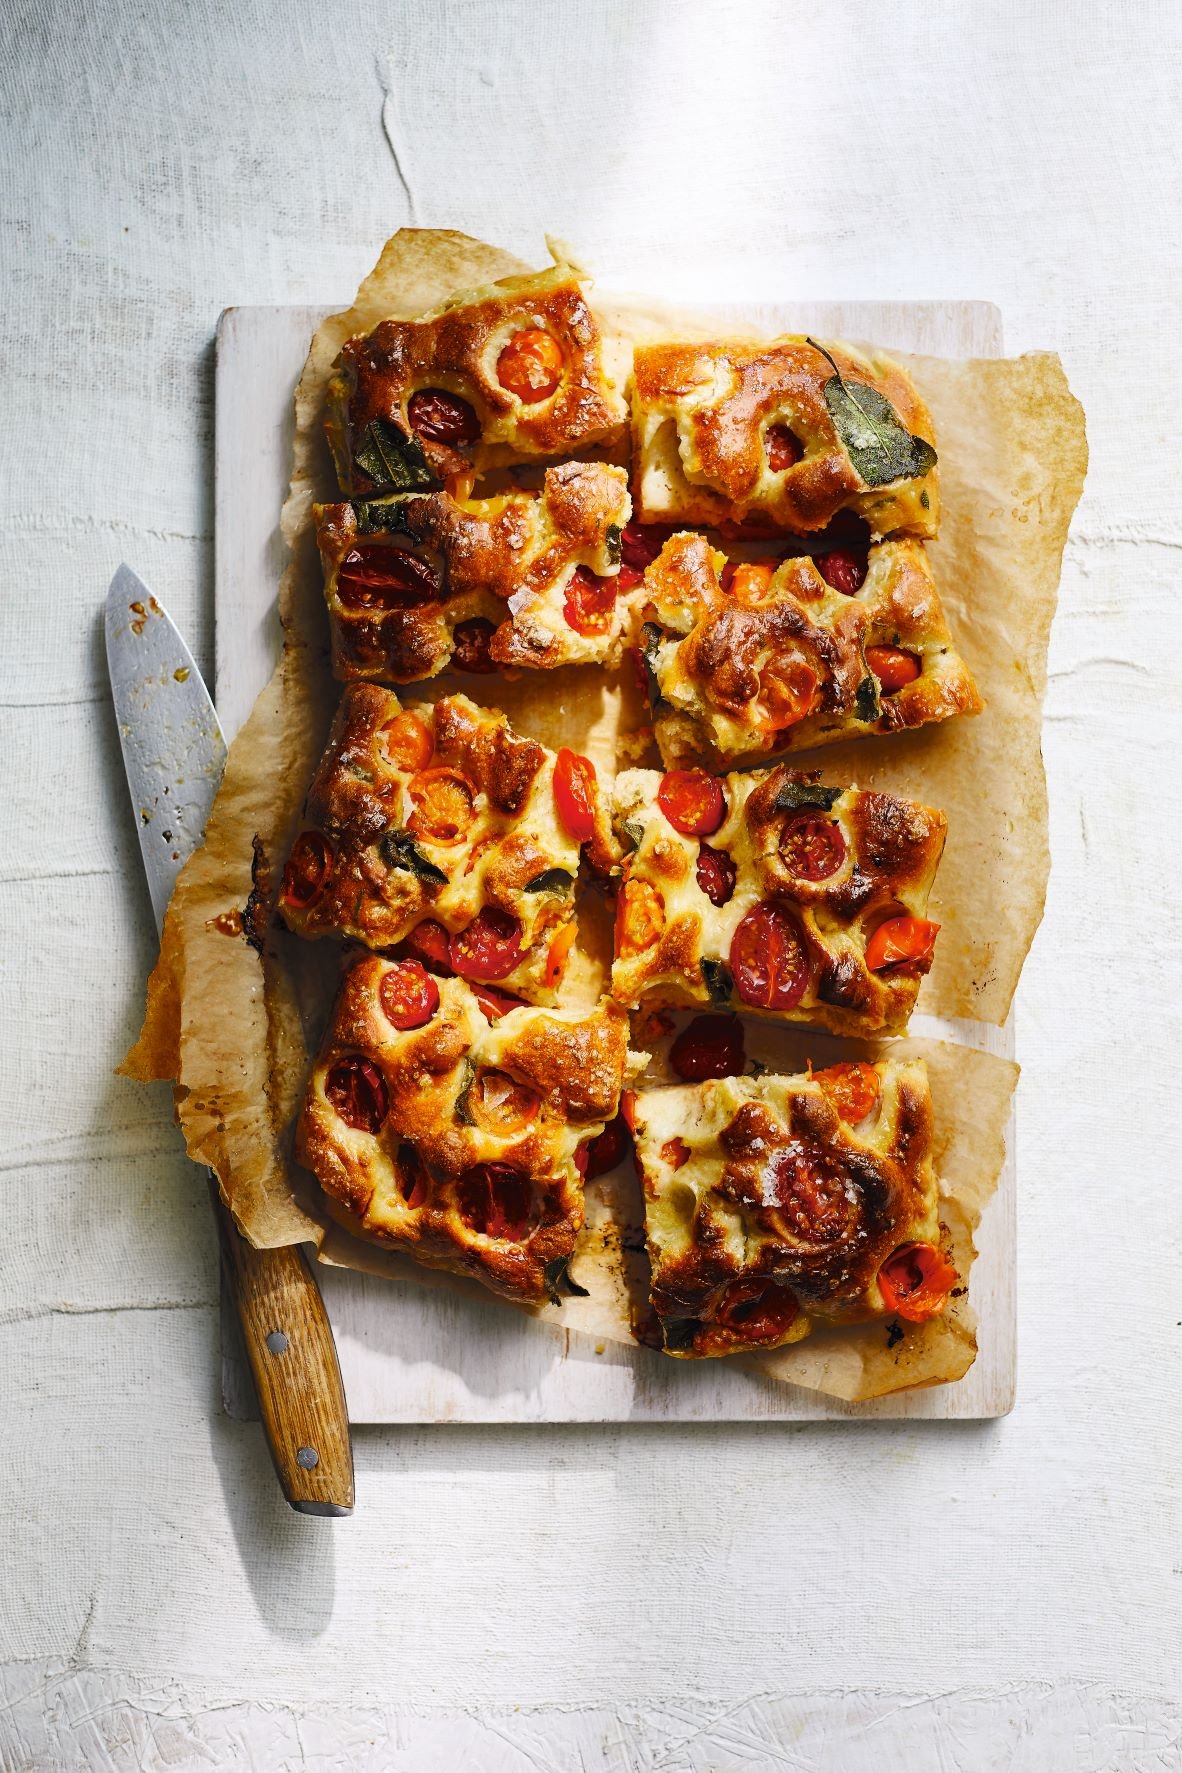
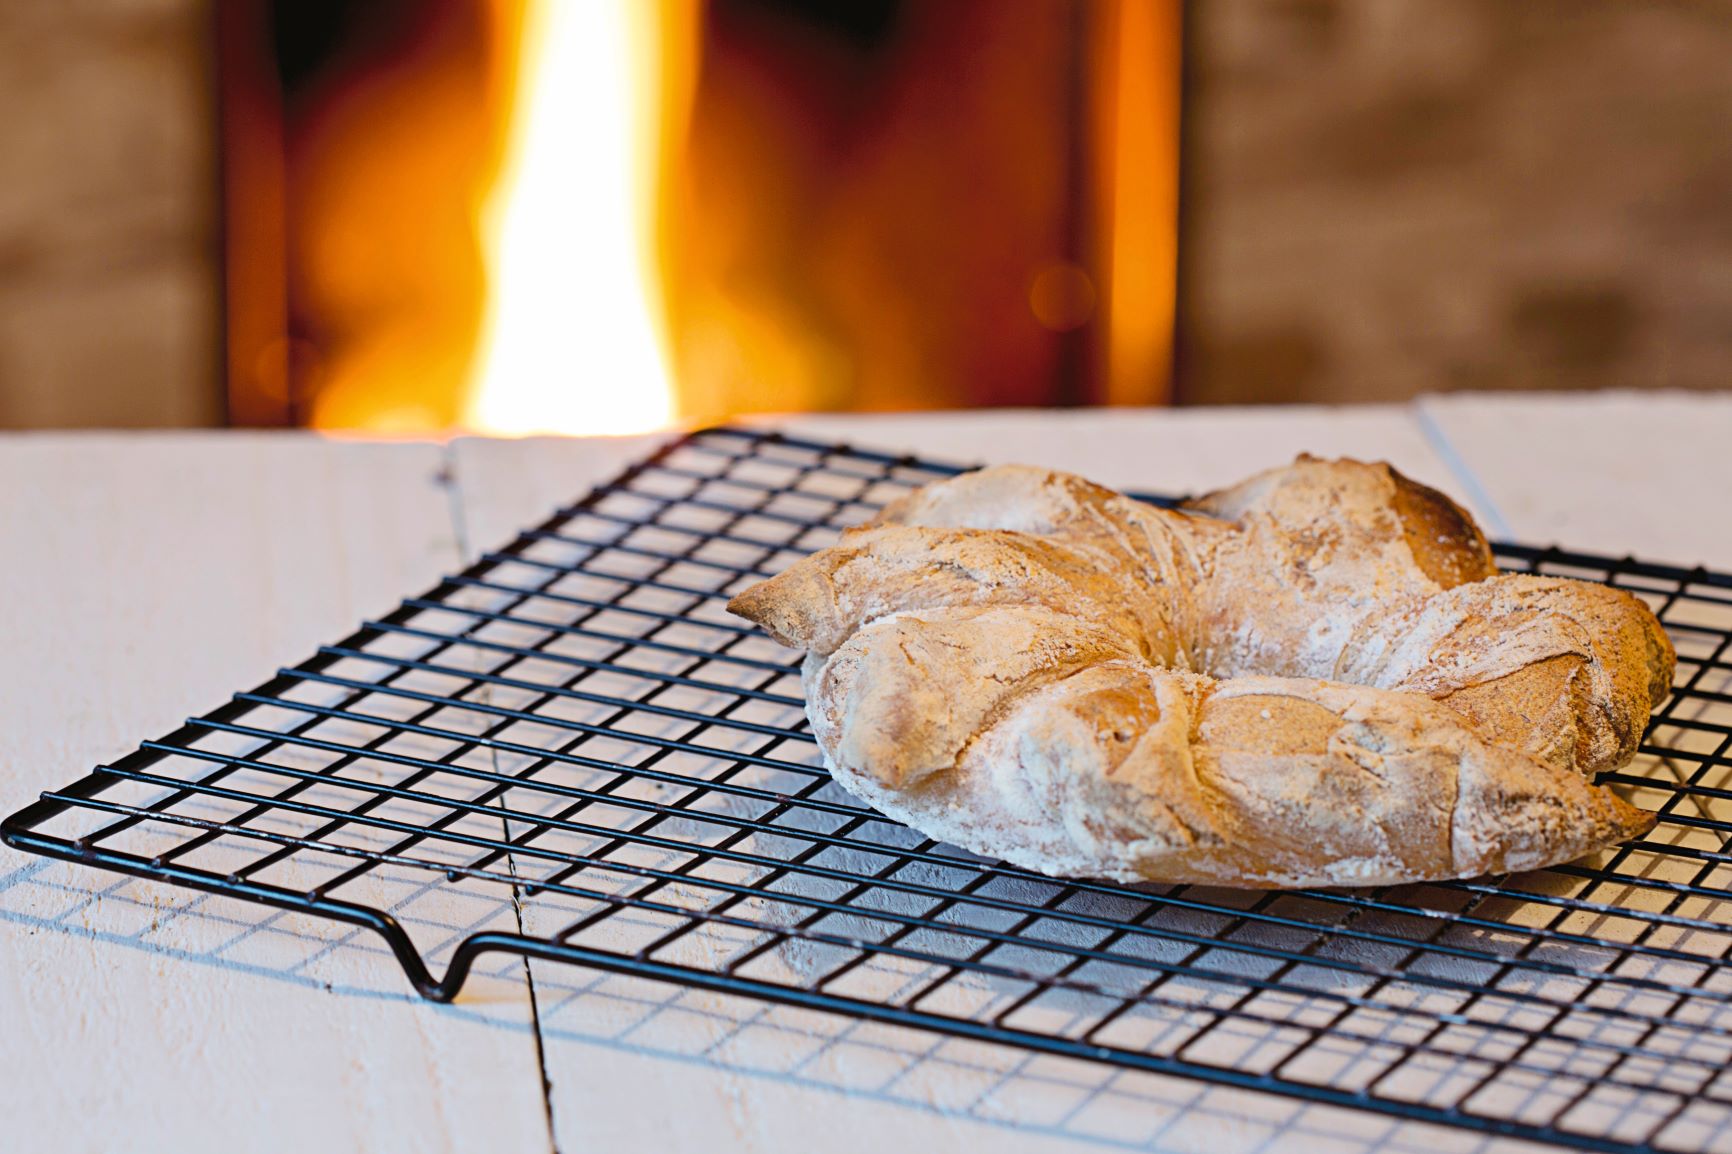
Is there anything more satisfying than making your own bread?

Pitta is extremely easy to make and it goes with everything because it’s light and doesn’t overpower a dish.

Pitta bread

7g instant yeast

240ml tepid/warm water
1 tsp golden caster sugar
400g plain flour
50ml olive oil, plus extra for oiling

1 Mix the yeast and warm water together in a large bowl. Leave for a couple of minutes and then add the sugar and stir through. Add the flour and olive oil and knead together until you have a smooth doughy consistency that bounces back. This should take 5-8 minutes. Leave the dough in an oiled bowl for about one hour until it has risen.

2 Preheat the oven to 220C/Fan 200C/425F.

3 Once risen, cut the dough into eight equal pieces and shape them into nice balls. Lay them on a baking tray and leave to rise for another 10 minutes. Once risen, flatten each ball with a rolling pin (not too thin), lay on a baking sheet and bake for 5 minutes or until the pittas have puffed up. Keep an eye on them during baking – bake for too long and the breads will be too crunchy and lose their softness.

4 Serve, dipping into some olive oil and za’atar if you like.

These will keep for a few days if sealed in an airtight container.

Recipe from Palestine on a Plate by by Joudie Kalla (Jacqui Small) Photography Ria Osbourne 


More from the October issue:

Featured
Oct 25, 2016
The tallest oak was once just a nut that held its ground
Oct 25, 2016
Oct 25, 2016
Oct 24, 2016
How to make a corn dolly
Oct 24, 2016
Oct 24, 2016
Oct 19, 2016
Be a kitchen witch!
Oct 19, 2016
Oct 19, 2016

More bread recipes:

Featured
Lammas Loaf.jpg
Aug 1, 2023
Bake | A Lammas loaf
Aug 1, 2023
Aug 1, 2023
Tomato focaccia 2.jpg
Sep 15, 2022
Recipe | Tomato Focaccia
Sep 15, 2022
Sep 15, 2022
Mar 11, 2020
Recipe | nettle soda bread
Mar 11, 2020
Mar 11, 2020
  Buy ,  download  or  subscribe   See the sample of our latest issue  here   Buy a copy of our latest anthology:  A Year of Celebrations   Buy a copy of  Flourish 2 , our wellbeing bookazine  Listen to  our podcast  - Small Ways to Live Well

Get hold of your copy of this month's The Simple Things - buy, download or subscribe

View the sampler here

In Eating Tags issue 52, october, bread, pitta bread, recipe
Comment
Image: Kirstie Young

Image: Kirstie Young

Living: Jam making and preserving

Lottie Storey September 20, 2016

The growing season may be almost over, but the preserving season is in full swing. If you have a spare afternoon and a freezer fruit glut, it's the best time of year to stir some fruit in a cauldron-like pan

Turn to page 42 of October's The Simple Things for Lia Leendertz's recipes for Blackberry and vanilla jam, Spiced damson and apple jelly, and Pink grapefruit and ginger marmalade.

Want some tips on pickling, pantries and preserves? Issue 39 of The Simple Things (September 2015) has plenty of tips beginning on page 116 (get back issues here!), or read on. 

Jam-making, an act steeped in nostalgia and nest making, is hard to resist, and at this time of year when rich fruit pickings abound, not just in the garden or allotment but also in the hedgerow, it feels almost like a duty to do it. This simple act of husbandry fills the kitchen with comforting smells and activity, the pantry with provisions and distils the essence of summer in a jar.

But before you disrupt the household with bubbling pans and empty jam jars, pull on an apron and gather together a few items.

A preserving pan (sometimes called a maslin pan) is essential, the stronger the better and preferably made of stainless steel which won't corrode. A jam thermometer takes the guesswork out of reaching the setting point, and a long-handled preserving spoon is handy for safe stirring. A jam funnel makes pouring hot jam into Kilner jars a simpler operation and a variety of labels and covers gives the end result a decorative flourish.

Preserving brings a little of the summer's flavour and colour to the chillier months when the choice of seasonal food is limited. But which preservation method to go for? Here are some options:

Pickling: fruit and vegetables are immersed in a vinegar and spice solution

Fermentation: vegetables are soaked in a spiced brine solution. Sugar is sometimes added. Kimchi, a Korean food staple, is the ultimate fermented food

Chutney: chopped fruit and veg are cooked with vinegar, spice and herbs, to produce a sweet-sour mixture with a chunky texture

Brining: cuts of meat are steeped in salt water

Salting: meat and fish are coated with salt to draw out moisture and kill bacteria


Seasonal pickling

Spring: rhubarb, cabbage, cauliflower, citrus fruit, asparagus

Summer: raspberries, plums, beetroot, asparagus, baby carrots, cucumbers, runner beans, apricots, courgettes, tomatoes, peaches

Autumn: apples, damsons, garlic, quince, blackberries, red cabbage, tomatoes, fennel, peppers

Winter: apples, cabbage, quince, citrus fruit

From How to Pickle by Gerard Baker for Lakeland


More from the October issue:

Featured
Oct 25, 2016
The tallest oak was once just a nut that held its ground
Oct 25, 2016
Oct 25, 2016
Oct 24, 2016
How to make a corn dolly
Oct 24, 2016
Oct 24, 2016
Oct 19, 2016
Be a kitchen witch!
Oct 19, 2016
Oct 19, 2016


More jam recipes:

Featured
jammie dodgers Louise Gorrod.jpg
Nov 6, 2021
Recipe | Homemade Jammie Dodgers
Nov 6, 2021
Nov 6, 2021
Mar 14, 2021
Recipe: Goose egg lemon curd
Mar 14, 2021
Mar 14, 2021
seville-and-blood-orange-marmalade-recipe.png
Jan 12, 2019
Recipe: Seville and Blood Orange Marmalade
Jan 12, 2019
Jan 12, 2019
  Buy ,  download  or  subscribe   See the sample of our latest issue  here   Buy a copy of our latest anthology:  A Year of Celebrations   Buy a copy of  Flourish 2 , our wellbeing bookazine  Listen to  our podcast  - Small Ways to Live Well

Get hold of your copy of this month's The Simple Things - buy, download or subscribe

View the sampler here

In Living, Eating Tags issue 52, jam, preserves, preserving, october
Comment

Recipe: Tomato pasta sauce

Lottie Storey September 19, 2016

Surprise someone with a care package

Who doesn’t like receiving nice parcels? Care packages show that the joy of giving doesn’t need to be restricted to birthdays or Christmas. 

October’s issue of The Simple Things includes a few ideas for putting together care packages – and this simple tomato sauce recipe is one of the suggestions for inclusion in the House Party package. It’s a great addition for a hand-delivered package – especially for a time-pushed recipient. A quick dinner solution, this is technically a pasta sauce, but try it added to a tin of beans to make fancy baked beans. We’ve also heard that it’s pretty tasty straight out of the jar…

Serves two as a pasta sauce for dinner

10 plum tomatoes,
halved lengthways olive oil, for drizzling
balsamic vinegar,  for drizzling
3 garlic cloves, unpeeled
5 basil leaves, torn in two, plus extra whole leaves for bottling


1 Preheat your oven to 160°C. Pop your tomato halves into a lined baking dish and season well with salt and pepper. Pour a generous glug of olive oil over each tomato, then follow suit with about one-third of the amount of balsamic. Mix the tomatoes, oil and vinegar together with your hands.
2 Add the garlic cloves and top each tomato half with a basil leaf half. Roast for an hour, checking every 20 minutes and rotating the dish to ensure even cooking, if necessary. Remove from the oven and allow to cool.
3 When the tomatoes have cooled, spoon into a clean glass jar (or jars), adding a few extra basil leaves to the sauce, preferably where they can be seen. 
4 Fasten the lid and have fun decorating the jar, or make it a label or tag to match your care package. This will last up to a week in your refrigerator – if you don’t eat it before then!

Tip - stuff in a baguette with Fior Di Latte cheese and fresh basil leaves, or mix with a tin of cannellini, lima or haricot beans for homemade fancy baked beans. 


See page 80 of October’s issue for more care package suggestions. 

Recipe from Care Packages by Michelle Mackintosh (Hardie Grant). Photography by Chris Middleton. 


More from the October issue:

Featured
Oct 25, 2016
The tallest oak was once just a nut that held its ground
Oct 25, 2016
Oct 25, 2016
Oct 24, 2016
How to make a corn dolly
Oct 24, 2016
Oct 24, 2016
Oct 19, 2016
Be a kitchen witch!
Oct 19, 2016
Oct 19, 2016

More tomato posts:

Featured
Tomatoes .jpg
Aug 10, 2024
The Rules | Tomato Sandwiches
Aug 10, 2024
Aug 10, 2024
Green Tomato Salsa.jpg
Sep 16, 2023
Recipe | Green Tomato Salsa
Sep 16, 2023
Sep 16, 2023
Tomato Tatin.jpg
Jul 15, 2023
Recipe | Tomato Tatin with Thyme Honey
Jul 15, 2023
Jul 15, 2023
  Buy ,  download  or  subscribe   See the sample of our latest issue  here   Buy a copy of our latest anthology:  A Year of Celebrations   Buy a copy of  Flourish 2 , our wellbeing bookazine  Listen to  our podcast  - Small Ways to Live Well

Get hold of your copy of this month's The Simple Things - buy, download or subscribe

View the sampler here

In Eating Tags issue 52, october, pasta sauce, tomatoes, care packages, pasta
Comment

Recipe: Courgette and pistachio cake with zesty lemon icing

Lottie Storey September 13, 2016

This pretty summer cake has to be the most satisfying way to deal with a glut of courgettes

Serves 12-16

300g caster sugar
5 eggs
350ml vegetable oil
11⁄2 tsp vanilla extract
100g pistachio nuts, chopped
80g ground almonds
650g grated courgettes
300g self-raising flour
100g plain flour
1 tsp bicarbonate of soda
11⁄2 tsp mixed spice


for the candied lemon zest

3 lemons
100g caster sugar


for the zesty lemon icing

125g unsalted butter
250g icing sugar, plus extra to dust 1 tsp vanilla extract
40ml whipping cream
zest and juice of 1 lemon


1 Preheat the oven to 170C/Fan 150C/ 325F. Grease a 23cm cake tin and line the base with baking paper.
2 In a mixing bowl, beat the sugar, eggs, vegetable oil and vanilla extract until thick, using an electric mixer. Fold in the pistachios, ground almonds and grated courgettes. Sift in the flours, bicarbonate of soda and mixed spice, then stir until well combined.
3 Pour the cake mixture into the prepared tin. Bake for 1 hour in the preheated oven, or until a skewer inserted into the middle of the cake comes out clean. Remove from the oven and leave to cool in the tin for 5-10 minutes, then turn out onto a wire rack and leave to cool completely.
4 To make the candied lemon zest, use a zester to peel the lemon zest into long, thin strands. Transfer to a small saucepan, add the sugar and 300ml water and bring
to the boil. Reduce the heat and simmer for 10-15 minutes, or until the lemon zest is translucent. Remove the zest using tongs or a slotted spoon, then spread out on a tray lined with baking paper and leave to dry for 10-15 minutes.
5 Make the zesty lemon icing by whisking the butter with an electric whisk until light and fluffy. Add the icing sugar and vanilla and whisk again for 3 minutes. Pour in the cream and whisk for a further 2 minutes, or until the icing is light and creamy. Mix in the lemon zest and juice and, using a spatula, spread the icing over the cake. Garnish with little nests of candied lemon zest, dust with icing sugar, then slice and serve.


Recipe from In the Kitchen by Simmone Logue (Murdoch Books)


More from the September issue:

Featured
Apr 18, 2017
Think: Discover your dosha
Apr 18, 2017
Apr 18, 2017
Sep 18, 2016
Enjoy the little things, one day you'll remember they were the big things
Sep 18, 2016
Sep 18, 2016
Sep 17, 2016
Nest: The poetry of paint names
Sep 17, 2016
Sep 17, 2016

More Cake in the House recipes:

Featured
20230609_Every_Last_Bite_Rosie_Sykes_Quadrille_Amazing_Chocolate_Coconut_Squares_017_Patricia_Niven.jpeg
Feb 8, 2025
Cake | Chocolate Coconut Squares
Feb 8, 2025
Feb 8, 2025
Dec 28, 2024
Recipe: Slow Orange Poppy Seed Cake
Dec 28, 2024
Dec 28, 2024
TORTA DI PATATA DOLCE E CIOCCOLATO - GENNARO'S VERDURE. IMAGE CREDIT DAVID LOFTUS.jpg
Sep 14, 2024
Cake | Sweet Potato & Chocolate Loaf
Sep 14, 2024
Sep 14, 2024

Get hold of your copy of this month's The Simple Things - buy, download or subscribe

View the sampler here

In Eating Tags issue 51, september, cake in the house, school holiday ideas
Comment

Recipe: Apple 'doughnuts'

Lottie Storey September 6, 2016

OK, so these aren’t real doughnuts, but you’ll be pleasantly surprised by how delicious (and addictive) they are, despite being far healthier than their sugary namesakes. Kids will love making and eating them – so why not turn it into a game and see who can be the most creative? Great for using up your apple harvest, the doughnuts make a fun breakfast or healthy snack at any time of day. 

MAKES 12

300g full-fat cream cheese
100g peanut, almond or cashew nut butter
2 tbsp fruit purée or coulis
1 tsp maple syrup or honey
2 large apples, either red or green or 1 of each
3 tbsp chocolate spread or toffee sauce (optional)
75g mixture of your chosen toppings (see below)

TOPPINGS:

dried fruit, eg golden raisins, cranberries, dried apricots or goji berries
nuts, eg hazelnuts, pecans, almonds or pistachios
seeds, eg pumpkin, sunflower,
toasted sesame or linseeds roasted nut and seed mix toasted coconut flakes
bee pollen
edible flowers

ESSENTIAL KIT:

apple corer

1 Line a tray with non-stick baking paper and set aside.
2 Divide the cream cheese between two small bowls. Mix the nut butter into one and the fruit purée or coulis into the other. Stir 1⁄2 tsp of syrup or honey into each bowl. Cover and set aside. Can be made a day in advance.
3 Use the apple corer to remove the cores. Cut each apple into six even-sized slices (including the ends) and lay them flat on the prepared tray, ends cut side up.
4 Spread the nutty cream cheese over six slices and the fruity one over the other six, leaving the hole clear. Use your toppings to decorate the apple doughnuts as you like. You can also chop your toppings into smaller pieces if you prefer. Either arrange them on top of the apple slices or press the creamy side down onto the toppings to stick.
5 As a further flourish, drizzle chocolate spread or toffee sauce over the apple doughnuts, if you like. To loosen the sauce for drizzling, spoon it into a small bowl and sit the bowl in another bowl of just-boiled water. Give it a good stir once it starts to melt.

These can be made up to a day ahead and kept covered in the fridge. Serve on a tiered stand or layered between small squares of baking paper in a nice box.

For a twist...

• Use chocolate spread instead of nut butter, or jam instead of fruit purée.
• Decorate the tops with cake sprinkles for a treat.

Recipe from The No-Cook Cookbook by Sharon Hearne-Smith (Quercus) 


More from the September issue:

Featured
Apr 18, 2017
Think: Discover your dosha
Apr 18, 2017
Apr 18, 2017
Sep 18, 2016
Enjoy the little things, one day you'll remember they were the big things
Sep 18, 2016
Sep 18, 2016
Sep 17, 2016
Nest: The poetry of paint names
Sep 17, 2016
Sep 17, 2016

Read more fruit recipes:

Featured
Two Thirsty Gardeners: An easy guide to planting soft fruits...
Mar 1, 2019
Two Thirsty Gardeners: An easy guide to planting soft fruits...
Mar 1, 2019

Whether you're talking blackberries, raspberries, gooseberries or more exotic varieties, now is the time to think about planting out soft fruit bushes – it's easier than you think and the results are SO delicious!

Mar 1, 2019
Sep 20, 2016
Recipe: Rustic autumnal fruit tart
Sep 20, 2016
Sep 20, 2016
Sep 6, 2016
Recipe: Apple 'doughnuts'
Sep 6, 2016
Sep 6, 2016
  Buy ,  download  or  subscribe   See the sample of our latest issue  here   Buy a copy of our latest anthology:  A Year of Celebrations   Buy a copy of  Flourish 2 , our wellbeing bookazine  Listen to  our podcast  - Small Ways to Live Well

Get hold of your copy of this month's The Simple Things - buy, download or subscribe

View the sampler here

In Fresh, Eating Tags issue 51, fruit recipe, apple, apples, school holiday ideas
Comment

Three recipes: Symmetry breakfasts by Michael Zee

Lottie Storey August 26, 2016

Breakfast is about feeding your loved ones, says Michael Zee, who creates dishes for two that taste as good as they look. Michael Zee’s beautiful and perfectly symmetrical breakfasts are hard to resist. What began as an Instagram of his boyfriend’s breakfast now has more than 600,000 followers and led to his first cookbook.

“Breakfast is the meal that most people take for granted,” says Michael. “Chewing at one’s desk or swigging a coffee on the go, we seem to care less and less about the most important meal of the day. I want to challenge the belief that there are breakfast foods and non-breakfast foods. The fact is, anything can be breakfast – and probably is, somewhere.”


Baghdad baid masus 

If you love shakshuka, then give these special eggs from Baghdad a try: eggs fried in a spiced cumin and coriander butter, with finely diced celery and onion, served with crispy pitta chips and a herby labneh dip.

2 pitta breads
Olive oil
3 tsp za’atar
50g butter
2 celery stalks, finely chopped
1 medium onion, finely chopped
1 clove garlic, grated or finely chopped
11⁄2 tsp cumin seed
11⁄2 tsp coriander seed
1 tsp hot paprika or chilli powder
4 eggs
200g labneh (substitute 170g cream cheese mixed with 30g yoghurt if you’re struggling to source this)
Fresh chopped mint, parsley and coriander
Juice of 1 lemon

Preheat your oven to 180°C.

Open up the pocket of each pitta and split each into two so that you have four ovals. Cut each into strips. Place them on a baking tray, drizzle with olive oil and sprinkle with za’atar. Bake for about 15 minutes until crunchy and brown around the edges.

Heat the butter in an ovenproof frying pan over a medium heat and add the celery, onion, garlic, cumin, coriander and paprika. Cook this for 10–12 minutes until soft.

Crack in the eggs and when they are just about set on top, put the pan in the oven with a lid on. The oven should still be hot (from baking the pitta) but not switched on.

In a bowl, mix the labneh with the freshly chopped herbs and lemon juice. Remove the eggs from the oven and season to taste with salt and pepper.

Serve from the pan at the table, with dollops of the herby labneh and pitta chips for dipping.


Ymerdrys 

Pop rye bread into a food processor, blitz it into a crumb and eat it with ymer, a type of sour yoghurt, and fresh fruit.

300g dark rye bread (or whatever you have left over)
2 tsp brown sugar
450g ymer or yoghurt
250g mixed soft berries

Preheat your oven to 180°C.

Tear the rye bread into chunks and put it in a food processor along with the sugar and any other flavourings you’ve decided on. Blitz until it resembles rubble.

Spread evenly over some baking paper on a baking tray. Bake for 15 minutes but give it a jiggle at around 7 minutes, for even cooking, then check again at 10 minutes.

Remove from the oven and allow to cool slightly. I like mine still a bit warm. Serve with yoghurt and fruit.


M’smmen 

A lovely flaky, crispy pancake from Morocco. Serve with honey and lashings of culinary argan oil (made from toasted argan kernels)

FOR THE DOUGH

450g plain flour
100g fine semolina
1 tsp caster sugar
1 tsp salt
1 sachet fast–action yeast
300ml tepid water

FOR FOLDING

Sunflower oil
100g soft butter
100g fine semolina

FOR THE TOPPINGS

Honey
Argan oil (go easy on this)
Pine nuts, lightly toasted
Mixed berries

Put all the dry ingredients for the dough into a bowl or mixer and add the water until the mix forms a slightly sticky dough. Be careful that you don’t add too much water at the start. If you’re using a mixer, knead the dough for about 5 minutes using a dough hook. If you’re working by hand, knead the dough on a floured surface for about 10 minutes. It should be smooth and elastic.

Split the dough into 10 balls and, using the sunflower oil, lightly coat each one so that it doesn’t dry out. Clear a large work surface to prepare your pancakes and generously oil so that the dough doesn’t stick.

Take a ball of dough and, with oiled hands, press it flat. Working from the middle outwards, keep going until the pancake is so thin you can almost see through it; don’t worry if you make some holes. Scantly spread some butter over and sprinkle some semolina on – this will help the flaky layers form when cooking.

Like folding a letter, fold the left two thirds in and then bring the right side over. You should have a narrow strip now. Bring the top down two thirds of the way and fold the bottom up to match. Now you have a square. Repeat until all the balls are folded.

Preheat a dry pan over a medium–high heat. Starting with the first square, flatten it out until it’s about twice its original size. Fry each pancake for about 5 minutes on each side until golden brown, flipping several times throughout.

Drizzle with honey, argan oil, pine nuts and berries.


All recipes from SymmetryBreakfast: Cook, Love, Share (Bantam Press) by Michael Zee. 


More from the September issue:

Featured
Apr 18, 2017
Think: Discover your dosha
Apr 18, 2017
Apr 18, 2017
Sep 18, 2016
Enjoy the little things, one day you'll remember they were the big things
Sep 18, 2016
Sep 18, 2016
Sep 17, 2016
Nest: The poetry of paint names
Sep 17, 2016
Sep 17, 2016

More breakfast recipes:

Featured
Alamy Full English.jpg
Feb 24, 2024
Breakfast Rules | How To Do a Full English
Feb 24, 2024
Feb 24, 2024
Reasons to wake up early.jpg
Jul 16, 2022
Go gökotta | (wake up with the birds)
Jul 16, 2022
Jul 16, 2022
Blackberry porridge Emma Cronan.JPG
Oct 3, 2020
Recipe | Warm Blackberry and Almond Overnight Oats
Oct 3, 2020
Oct 3, 2020
  Buy ,  download  or  subscribe   See the sample of our latest issue  here   Buy a copy of our latest anthology:  A Year of Celebrations   Buy a copy of  Flourish 2 , our wellbeing bookazine  Listen to  our podcast  - Small Ways to Live Well

Get hold of your copy of this month's The Simple Things - buy, download or subscribe

View the sampler here

In Eating Tags issue 51, september, breakfast recipe, breakfast, brunch recipe
Comment
Recipe: Lia Leendertz, photography: Kirstie Young

Recipe: Lia Leendertz, photography: Kirstie Young

Recipe: Walnut and damson cheese sausage rolls

Lottie Storey August 22, 2016

September's The Simple Things includes three recipes by Lia Leendertz in celebration of the ancient agricultural festival of Mabon.

Says Lia, 'I love a sausage roll, particularly to pack up and take on a picnic, and these contain all the nutty fruitiness of the season. Damson cheese is a sort of thick, sliceable jam, which I often make from my damson glut to eat with cheese and crackers, but it’s lovely here. If you can’t get hold of it, just use plum jam instead'.

Want to make Damson cheese? Scroll down for a recipe. 

Walnut and damson cheese sausage rolls

Makes 6 large or 18 small

50g walnuts, plus a few extra
400g free-range sausage meat or 6 pork sausages
a few sage leaves, chopped
250g pack puff pastry
100g damson cheese
1 egg, lightly beaten

1 Preheat the oven to 180C/Fan 160C/350F. Tip the walnuts onto a baking tray and bake for 7-10 minutes, until slightly toasted. Set aside to cool, then chop roughly.

2 In a bowl, combine the sausage meat (if using sausages, squeeze them out of their skins), chopped toasted walnuts and sage. If using sausage meat, season with salt and freshly ground black pepper (sausages are already well seasoned). Use your hands to mix everything together thoroughly.

3 Lay out your rectangle of pastry and slice it into three across the shorter length to give three long strips. Cut the damson cheese into batons and lay it in a line down the middle of each strip. Divide the sausage mixture and arrange it evenly along the three lengths. Carefully roll the mixture up, brushing one edge with beaten egg to stick the edges of the pastry together. Turn the roll over so that the seam is on the bottom, then cut it into however many lengths you want. Place on a baking tray lined with baking paper.

4 Brush the tops of the sausage rolls with beaten egg, then chop a few extra walnuts and sprinkle them over the top. Finish with flakes of sea salt. Bake in the preheated oven for at least 25 minutes. I often leave mine for longer, as I love the pastry really crisp and well done. Remove from the oven when yours are as you want them and leave to cool a little before eating (they’re delicious still slightly warm). 


Damson cheese

Recipe by Hugh Fearnley-Whittingstall for the Guardian (visit the original page for more damson recipes).

This traditional fruit "cheese" is a very thick, sliceable preserve that is immensely good served with actual cheese. It keeps for ages. Makes 850-900g.

2kg damsons
Around 750g granulated sugar

1. Put the damsons in a large preserving pan, add a couple of tablespoons of water and bring slowly to a simmer, stirring as the fruit begins to release its juices. Leave to simmer until completely soft. Tip the contents of the pan into a sieve and rub it through to remove the stones and skin, leaving you with a smooth damson purée.

2. Measure the purée by volume. For every 500ml, add 350g sugar, and combine in a large, heavy-based pan. Bring to a simmer over a low heat, stirring to dissolve the sugar, then cook gently, stirring regularly so it doesn't catch, until reduced to a thick purée. It's ready when you drag the spoon across the bottom of the pan and the base stays clearly visible for a second or two. This can take up to an hour of gentle, popping simmering and stirring.

3. Pour the "cheese" into very lightly oiled shallow plastic containers and leave to cool and set. It will keep almost indefinitely in the fridge. Serve in slices with bread and cheese, or, if you fancy, cut into cubes, dust lightly with granulated sugar and serve as a petit four.


More from the September issue:

Featured
Apr 18, 2017
Think: Discover your dosha
Apr 18, 2017
Apr 18, 2017
Sep 18, 2016
Enjoy the little things, one day you'll remember they were the big things
Sep 18, 2016
Sep 18, 2016
Sep 17, 2016
Nest: The poetry of paint names
Sep 17, 2016
Sep 17, 2016

More Seed to Stove recipes:

Featured
sun bread.jpg
Dec 21, 2021
Bake: sun bread for Yule
Dec 21, 2021
Dec 21, 2021
May 2, 2021
Recipe: Wild garlic bannocks with asparagus pesto
May 2, 2021
May 2, 2021
Jul 25, 2020
Recipe: Deep-fried courgette flowers with broad bean, pea and mint puree and basil pesto
Jul 25, 2020
Jul 25, 2020
  Buy ,  download  or  subscribe   See the sample of our latest issue  here   Buy a copy of our latest anthology:  A Year of Celebrations   Buy a copy of  Flourish 2 , our wellbeing bookazine  Listen to  our podcast  - Small Ways to Live Well

Get hold of your copy of this month's The Simple Things - buy, download or subscribe

View the sampler here

In Eating, Living Tags seed to stove, issue 51, september, allotment, pork
Comment

Recipe: Raspberry, apricot and orange ice lollies

Lottie Storey August 18, 2016

Soaked cashews are the secret to lovely, creamy dairy-free lollies. Start the night before to allow time for the cashews to soak

Makes 8
6 large apricots (approx 500g), sliced
juice of an orange
125g fresh or frozen locally grown raspberries*
4–5 tbsp pure maple syrup (or honey)
60g raw cashews, soaked overnight in cold water, drained and rinsed
1 tsp finely grated orange zest small pinch of fine sea salt
* If using frozen berries, allow them to defrost a little before using in this recipe

1 Place apricots and orange juice in a medium saucepan, cover with a lid and bring to the boil. Reduce to a simmer and cook for 5 mins. Remove lid and cook for a further 8–10 mins, stirring often to prevent the bottom from catching, until thick and pulpy. Remove from heat and set aside to cool.

2 Combine raspberries and 1–2 tbsp of the maple syrup in a small bowl and lightly crush with a fork to form a rough paste. Divide evenly between 8 lolly moulds and set aside.

3 Transfer cooled apricots to a blender, along with soaked cashews, 3 tbsp maple syrup, orange zest and salt. Blend until smooth. Pour into moulds (it’s a thick mixture, so you may need a spoon to help), then using a knife, marble the raspberries through the apricot mixture slightly. Insert wooden sticks and freeze for at least 4 hours or overnight.

4 Run moulds under warm water to help release the popsicles.

Recipe taken from A Year In My Real Food Kitchen by Emma Galloway (Harper Collins) 

More from the August issue:

Featured
Aug 27, 2016
Wellbeing: How to embrace idleness
Aug 27, 2016
Aug 27, 2016
Aug 18, 2016
Recipe: Raspberry, apricot and orange ice lollies
Aug 18, 2016
Aug 18, 2016
Aug 16, 2016
Competition: Win one of three natural skincare hampers from MOA worth £110
Aug 16, 2016
Aug 16, 2016

More summer recipes:

Featured
Mocha ice cream.jpg
Aug 7, 2021
Recipe | Mocha ice cream cones
Aug 7, 2021
Aug 7, 2021
SIM88.GATHERING_219A1870 copy.jpg
Sep 19, 2019
Recipe | Ginger snaps
Sep 19, 2019
Sep 19, 2019
Mackies.jpg
Jun 19, 2019
Win | a sundae kit worth £100
Jun 19, 2019
Jun 19, 2019
  Buy ,  download  or  subscribe   See the sample of our latest issue  here   Buy a copy of our latest anthology:  A Year of Celebrations   Buy a copy of  Flourish 2 , our wellbeing bookazine  Listen to  our podcast  - Small Ways to Live Well

Get hold of your copy of this month's The Simple Things - buy, download or subscribe

View the sampler here

In Eating Tags issue 50, august, recipe, fruit recipe, ice lollies, school holiday ideas
Comment

Recipe: Coco Cabana cocktail

Lottie Storey August 8, 2016

With 120 fruits native to its rainforest, there’s no wonder Brazilians make a mean cocktail. If watching the Olympics this month makes you pine for tropical climes, mix yourself a jug of this fabulously kitsch cocktail (palm trees essential) and the combination of rum, cachaça, strawberries and coconut will instantly transport you from kitchen to Copacabana beach.

Coco Cabana 

75ml cachaça
75ml Malibu
50ml coconut cream
50ml lemon juice
50ml simple sugar syrup
90ml pineapple juice
180ml coconut water
75ml strawberry purée ice cubes
1 orange, sliced
1 lemon, sliced

Pour all the ingredients except the orange and lemon slices into a large jug and stir well.
Fill with ice and stir again.
Top with lemon and orange slices.

Pronounced ka-sha-sa, cachaça is the national drink of Brazil and appears in many of its cocktails. Like rum, it’s a sugar cane spirit, but distilled directly from fermented sugar cane juice rather than from the molasses. It’s now possible to find simple brands such as Sagatiba in larger supermarkets or specialist spirit shops. If you’re at loss or don’t like the taste (some people find it too rough or strong), you can substitute vodka or rum. Oh and Brazilians do really run their cars on it sometimes – if you’re ever crossing the road and notice a waft of sweetness in the air, that’s the ethanol from the sugar cane. Not one to try at home.

Recipe from Carnival! By David Ponte, Lizzy Barber and Jamie Barber (Quadrille)
Photography by Martin Poole  


Read more from the August issue:

Featured
Aug 27, 2016
Wellbeing: How to embrace idleness
Aug 27, 2016
Aug 27, 2016
Aug 18, 2016
Recipe: Raspberry, apricot and orange ice lollies
Aug 18, 2016
Aug 18, 2016
Aug 16, 2016
Competition: Win one of three natural skincare hampers from MOA worth £110
Aug 16, 2016
Aug 16, 2016

More cocktail recipes:

Featured
Jun 21, 2025
Recipe: A wild midsummer cocktail
Jun 21, 2025
Jun 21, 2025
Dec 21, 2024
Solstice Tipple: Clementine Cocktails
Dec 21, 2024
Dec 21, 2024
Peach gin and tonics.jpg
Sep 4, 2021
Tipple | Peach Gin and Tonics
Sep 4, 2021
Sep 4, 2021
  Buy ,  download  or  subscribe   See the sample of our latest issue  here   Buy a copy of our latest anthology:  A Year of Celebrations   Buy a copy of  Flourish 2 , our wellbeing bookazine  Listen to  our podcast  - Small Ways to Live Well

Get hold of your copy of this month's The Simple Things - buy, download or subscribe

View the sampler here

In Fresh, Eating Tags issue 50, august, Cocktail recipes, cocktail recipes, coctails
1 Comment
Photograph: Kirstie Young

Photograph: Kirstie Young

Recipe: Toasted basil and blackberry brioche with summer berries

Lottie Storey August 2, 2016

Try this berry harvest bake from Lia Leendertz

'A berry- and herb-studded brioche is a great way to celebrate this moment of wheat and berries, but to say making brioche is a bit of a faff would be quite the understatement. It’s a fun project but this dessert will work beautifully with thick, toasted slices of a good-quality bought brioche loaf if you don’t have the time to make your own. The brioche recipe is based on a recipe from River Cottage Baking, with a few additions of my own. Ideally, start making this the day before you need it, as the dough benefits from spending a night in the fridge.'

Makes 2 small loaves, serves 4-6

For the basil and blackberry brioche

400g strong white bread flour
5g powdered dried yeast
10g salt
90ml warm milk
2 tbsp caster sugar
100g butter, softened
4 eggs, beaten
a handful of blackberries per loaf
basil leaves

To glaze
1 egg
2 tbsp milk

For the fruits
210g blueberries
170g blackberries
4 figs, quartered
a few sprigs of thyme

1 For the brioche, put all of the ingredients except the basil, the berries and the glaze ingredients into a large bowl and bring it all together into a dough. Knead for ten minutes (or put the dough into the bowl of your food processor and use the dough hook on it for ten minutes). Place it in a bowl, cover, and chill overnight. The next morning, remove it from the fridge and shape it into your loaves – I put mine into a round cake tin or small loaf tins – then leave them somewhere warm to prove. This could take several hours as the dough will be starting from cold.

2 Preheat the oven to 200C/Fan 180/400F. Once the loaves have doubled in size, decorate them by pushing the blackberries into the surface and laying the basil leaves across it, then beat the egg and the milk together and paint it across the surface. Bake for 10 minutes, then lower the oven setting to 180C/Fan 160/350F and bake for a further 30 minutes or until golden brown. Cool on a wire rack.

3 Place the fruits and thyme into a saucepan and simmer gently until the berries have burst, the juice is released and the figs are turned the colour of the blackberries. Slice the brioche and toast a piece per person. Serve each person a small bowlful and a piece of toasted brioche to scoop up the warm, herby fruit and to dip into the juices. 


Lia Leendertz is a freelance gardening writer and the author of several books, including My Tiny Veg Plot and My Cool Allotment. Her first cookery book, Petal, Leaf, Seed: Cooking with the Garden’s Treasures is out now.  

Read more from the August issue:

Featured
Aug 27, 2016
Wellbeing: How to embrace idleness
Aug 27, 2016
Aug 27, 2016
Aug 18, 2016
Recipe: Raspberry, apricot and orange ice lollies
Aug 18, 2016
Aug 18, 2016
Aug 16, 2016
Competition: Win one of three natural skincare hampers from MOA worth £110
Aug 16, 2016
Aug 16, 2016


More Seed to Stove recipes:

Featured
sun bread.jpg
Dec 21, 2021
Bake: sun bread for Yule
Dec 21, 2021
Dec 21, 2021
May 2, 2021
Recipe: Wild garlic bannocks with asparagus pesto
May 2, 2021
May 2, 2021
Jul 25, 2020
Recipe: Deep-fried courgette flowers with broad bean, pea and mint puree and basil pesto
Jul 25, 2020
Jul 25, 2020
  Buy ,  download  or  subscribe   See the sample of our latest issue  here   Buy a copy of our latest anthology:  A Year of Celebrations   Buy a copy of  Flourish 2 , our wellbeing bookazine  Listen to  our podcast  - Small Ways to Live Well

Get hold of your copy of this month's The Simple Things - buy, download or subscribe

View the sampler here

In Eating Tags issue 50, august, seed to stove, blackberry, brioche, baking
1 Comment
Recipe and image: Ben Mostyn and Annie Brettell

Recipe and image: Ben Mostyn and Annie Brettell

Recipe: Pea, mint, spinach and goat’s cheese quiche

Lottie Storey July 28, 2016

This quiche is simple to make and packed with summery flavours

Turn to page 34 of August's The Simple Things for the full riverbank picnic menu: Pork and egg pie with a lattice top, Pea, mint, spinach and goat’s cheese quiche, Potato salad, and Meringue kisses. 

Pea, mint, spinach and goat’s cheese quiche

280g plain flour, plus extra for dusting the work surface
140g cold butter, cut into little pieces
6 tbsp cold water
300g frozen peas
handful of mint leaves
3 tbsp olive oil
2 eggs
284ml double cream
200g goat’s cheese
handful of baby spinach, wilted and water squeezed out in a tea towel

1 In a blender, combine the butter, water and flour until it resembles breadcrumbs. Roll up in to a ball and cover in clingfilm and rest in the fridge until ready*.

2 Cook the peas for 3 mins in boiling water, then drain and chill under the cold tap. In a hand blender, whizz together the peas, mint and olive oil, and season to taste.

3 Preheat oven to 200C/Fan 180C/400F.

4 Roll the pastry out on a floured surface to a circle about 3cm bigger than a 25cm tin. Drape the pastry over the tin and gently push the pastry into place using a little scrap of pastry. Leave a little pastry over the edge of the tin; this can be removed later. Chill in fridge for 10-15 mins.

5 Lightly prick the base of the tart and line with baking paper and ceramic baking beans. Blind bake for 20 mins, then carefully remove the beans and bake for a further 5-10 mins until lightly browned.

6 While the pastry is baking, beat the eggs in a large bowl. Add the cream and season.

7 When the case is ready, spread the pea mixture over the bottom of the tart case. Pour over the egg mixture. Scatter the crumbled goat’s cheese and wilted spinach over the top of the quiche.

8 Bake for 20-25 mins until set and the top is browned. Trim the edges of the pastry off and leave to cool on a wire rack. 


*Or buy shortcrust pastry readymade from the supermarket if you’re short on time or inclination. 


More from the August issue:

Featured
Aug 27, 2016
Wellbeing: How to embrace idleness
Aug 27, 2016
Aug 27, 2016
Aug 18, 2016
Recipe: Raspberry, apricot and orange ice lollies
Aug 18, 2016
Aug 18, 2016
Aug 16, 2016
Competition: Win one of three natural skincare hampers from MOA worth £110
Aug 16, 2016
Aug 16, 2016

Read more picnic posts:

Featured
picnic pie 2 square.jpeg
Jun 28, 2025
Recipe | Veggie Picnic Pie
Jun 28, 2025
Jun 28, 2025
Yogurt Cherry Crumble Jars.jpg
Jun 7, 2025
Recipe | Yogurt, cherry & passionfruit crumble jars
Jun 7, 2025
Jun 7, 2025
Picnic.jpg
Jun 2, 2024
Fun | Games for Picnics
Jun 2, 2024
Jun 2, 2024
  Buy ,  download  or  subscribe   See the sample of our latest issue  here   Buy a copy of our latest anthology:  A Year of Celebrations   Buy a copy of  Flourish 2 , our wellbeing bookazine  Listen to  our podcast  - Small Ways to Live Well

Get hold of your copy of this month's The Simple Things - buy, download or subscribe

View the sampler here

In Eating, Gathering Tags issue 50, recipe, picnic, summer, outdoors
1 Comment

Recipe: Nectarine honey cakes

Lottie Storey July 7, 2016

The beautiful oral tones of honey can make baked goods sing. Slices of nectarine top these tender little cakes, but you could also use peach, apricot or plums 

During the summer months when stone fruits are cheap and plentiful, you can buy fruit in bulk, slice, lay out on a tray, freeze and then transfer it to zip-lock bags. You can then use the slices in
smoothies. Or, lightly stew and freeze in containers to later use in pies, tarts and crumbles – there’s nothing like pulling out a container of summer fruit to make a pud in the midst of winter. 

Nectarine honey cakes 

Makes 9 (Gluten-free)

75g butter, diced
60ml honey
80g ground almonds
45g ne brown rice our
2 tbsp arrowroot or gluten-free organic corn flour
1 tsp gluten-free baking powder
Finely grated zest of 1 small lemon
60ml (1/4 cup) almond, rice or coconut milk
1 large free-range egg
1 tsp vanilla extract
1 medium nectarine, thinly sliced

1 Preheat oven to 160C/Fan 140C/310F. Grease a nine-hole friand tin generously with melted butter. Place butter and honey into a small saucepan and set over a low heat, stirring often until the butter has just melted. Remove from heat and set aside to cool for 5 minutes.
2 Place ground almonds in a medium bowl and sift over the brown rice flour, arrowroot or cornflour, and baking powder. Add lemon zest and whisk well to evenly distribute flours. Whisk milk, egg and vanilla extract in a separate bowl.
3 Add to dry ingredients along with melted butter and honey. Whisk to form a smooth batter. Pour some batter into each friand hole and top with a couple of slices of nectarine.
4 Bake for 15–20 minutes or until golden – a skewer inserted into the centre should come out clean. Remove from oven and set aside for 5 minutes. Run a thin knife around the outside of each cake, then gently remove and transfer to a wire rack to cool further.

Cakes are best eaten on the day of baking; however, they will store, airtight, for 3 days.

Recipe from A Year in My Real Food Kitchen by Emma Galloway (HarperCollins)


Read more from the July issue:

Featured
Jul 25, 2016
Escape: Sand, sea, surf
Jul 25, 2016
Jul 25, 2016
Jul 19, 2016
The Simple Things letterpress print
Jul 19, 2016
Jul 19, 2016
Jul 15, 2016
Dogs in blankets with Laughing Dog
Jul 15, 2016
Jul 15, 2016

More cake recipes:

Featured
20230609_Every_Last_Bite_Rosie_Sykes_Quadrille_Amazing_Chocolate_Coconut_Squares_017_Patricia_Niven.jpeg
Feb 8, 2025
Cake | Chocolate Coconut Squares
Feb 8, 2025
Feb 8, 2025
Dec 28, 2024
Recipe: Slow Orange Poppy Seed Cake
Dec 28, 2024
Dec 28, 2024
TORTA DI PATATA DOLCE E CIOCCOLATO - GENNARO'S VERDURE. IMAGE CREDIT DAVID LOFTUS.jpg
Sep 14, 2024
Cake | Sweet Potato & Chocolate Loaf
Sep 14, 2024
Sep 14, 2024
  Buy ,  download  or  subscribe   See the sample of our latest issue  here   Buy a copy of our latest anthology:  A Year of Celebrations   Buy a copy of  Flourish 2 , our wellbeing bookazine  Listen to  our podcast  - Small Ways to Live Well

Get hold of your copy of this month's The Simple Things - buy, download or subscribe

View the sampler here

In Eating Tags issue 49, july, cake, recipe, school holiday ideas
Comment

Recipe: Pea cheesecake

Lottie Storey June 30, 2016

This makes a delicious light lunch or summer starter, and uses everything but the pod itself from the pea plant. (If you want to save your pea flowers to turn into more peas, omit them or use other edible flowers.) Savoury cheesecakes are a great alternative to quiches and tarts and, as this recipe uses oatcakes for the base, it is wheat-free, too.  

Pea cheesecake

Serves 4–6 as a light lunch with salad, 8–10 as a starter
1 × 23cm spring-form tin, greased and base-lined

base tier

200g oatcakes
100g unsalted butter
parmesan crisps
20g Parmesan cheese, finely grated pea purée
100g butter
2 garlic cloves, crushed
300g peas
filling
360g cream cheese
120ml double cream
4 eggs
zest of 1 lemon
salt and pepper, to taste
100g peas

decoration

handful of pea shoots, edible flowers (eg pea flowers, violas)

1 For base tier, put the oatcakes in a food bag and bash with a rolling pin until they are reduced to crumbs. Melt the butter, then combine with the crumbs in a bowl, mixing to coat. Press into the base of the tin in an even tier (a potato masher is the best tool here). Chill in the fridge for at least half an hour.

2 For the Parmesan crisps, preheat oven to 180C. Put 10 large pinches of grated cheese on a baking sheet, leaving space for them to spread. Place baking sheet in oven and, watching all the time, let the cheese melt into flat, slightly browned crisps. Remove from the oven and cool the crisps on the baking sheet.

3 For the pea purée, melt butter in a frying pan. Add garlic to the butter as it melts, but do not let it brown. Pour over the peas and blend to a rough purée.

4 For filling, whisk cream cheese, double cream, eggs and lemon zest in a large bowl. Add the pea purée, season, and whisk again until everything is incorporated. Stir in the whole peas. Pour filling over the base tier and bake for 35–40 mins until the cheesecake does not wobble when the tin is shaken, and the top is golden.

5 Turn the cheesecake out onto a plate, scatter over the pea shoots and flowers. Nestle the Parmesan crisps among them. Serve warm, with a peppery side salad.

Recipe from Grow Your Own Cake by Holly Farrell (Frances Lincoln) Photography Jason Ingram


Read more from the July issue:

Featured
Jul 25, 2016
Escape: Sand, sea, surf
Jul 25, 2016
Jul 25, 2016
Jul 19, 2016
The Simple Things letterpress print
Jul 19, 2016
Jul 19, 2016
Jul 15, 2016
Dogs in blankets with Laughing Dog
Jul 15, 2016
Jul 15, 2016

More summer recipes: 

Featured
JUNE PLAYLIST.png
May 22, 2024
Playlist | Songs for a barbecue
May 22, 2024
May 22, 2024
Crop dessert pizza Rebecca Lewis.jpg
May 18, 2024
Recipe | Nectarine & Apricot Pudding Pizza
May 18, 2024
May 18, 2024
Gathering Coleslaw.jpg
Aug 13, 2022
Recipe | Summer Veg Coleslaw with Coriander
Aug 13, 2022
Aug 13, 2022
  Buy ,  download  or  subscribe   See the sample of our latest issue  here   Buy a copy of our latest anthology:  A Year of Celebrations   Buy a copy of  Flourish 2 , our wellbeing bookazine  Listen to  our podcast  - Small Ways to Live Well

Get hold of your copy of this month's The Simple Things - buy, download or subscribe

View the sampler here

In Eating Tags issue 49, summer, july, recipe, pea
Comment

Recipe: Vietnamese vegetable summer rolls

Lottie Storey June 27, 2016

These pretty, light rolls are delicious with a piquant sauce


Makes 14

80g vermicelli rice noodles
14 edible rice papers
14 butterhead or other soft lettuce leaves
100g beansprouts
14 thin carrot batons, peeled
14 thin cucumber batons
2 handfuls fresh coriander leaves, roughly chopped
14 fresh mint leaves, roughly chopped
1 red chilli, sliced

For the dipping sauce:
4 tbsp hoisin sauce
4 tbsp peanut butter
lime juice to taste

1 Prepare the dipping sauce by mixing together all the ingredients in a small bowl. Cover and refrigerate until needed.

2 Cook the vermicelli according to the instructions on the packet. Drain and set aside.

3 Soften the rice papers. Fill a large bowl with warm water. Carefully and slowly dip the rice papers in one by one. Leave each one for about 20 seconds until totally soft. Lay the rice papers out on a dry cloth as you finish.

4 On top of each rice paper, arrange a lettuce leaf (trimmed to size if needed) a small handful of vermicelli and a small handful of beansprouts. Add carrot, cucumber, herbs and chilli, always keeping about 5cm of wrapper uncovered on each side of the filling.

5 Fold the uncovered side inwards, then tightly roll the rice paper into a sausage shape around the filling. Repeat with the remaining ingredients.

6 Serve the rolls chilled with the dipping sauce on the side. 


Recipe from Modern Dim Sum by Loretta Liu. Photography: Louise Hagger (Ryland Peters & Small)

Read more from the July issue:

Featured
Jul 25, 2016
Escape: Sand, sea, surf
Jul 25, 2016
Jul 25, 2016
Jul 19, 2016
The Simple Things letterpress print
Jul 19, 2016
Jul 19, 2016
Jul 15, 2016
Dogs in blankets with Laughing Dog
Jul 15, 2016
Jul 15, 2016

More recipes from around the world:

Featured
Jan 11, 2016
Food from Afar: Som Tam
Jan 11, 2016
Jan 11, 2016
Food from afar: Bento box
Sep 24, 2014
Food from afar: Bento box
Sep 24, 2014
Sep 24, 2014
Food from afar: Pintxos recipe
Jun 4, 2014
Food from afar: Pintxos recipe
Jun 4, 2014
Jun 4, 2014
  Buy ,  download  or  subscribe   See the sample of our latest issue  here   Buy a copy of our latest anthology:  A Year of Celebrations   Buy a copy of  Flourish 2 , our wellbeing bookazine  Listen to  our podcast  - Small Ways to Live Well

Get hold of your copy of this month's The Simple Things - buy, download or subscribe

View the sampler here

In Eating, Escaping Tags recipe, food from afar, issue 49, july, summer
Comment

Recipe: Smoked bitter chocolate

Lottie Storey June 19, 2016

In July's The Simple Things, we throw a grown-up barbecue; where veggies and even desserts go on the grill. Ben Tish is chef director at the Salt Yard Group, which runs four restaurants in London. Recipes are taken from his new book Grill Smoke BBQ. 

Try the recipe for Smoky bitter-chocolate puddings with melting whipped cream on page 39 - you can just use plain chocolate (at least 70% cocoa) or try this recipe for smoked bitter chocolate.   

'Smoked chocolate is a revelation, whether you eat it raw or melted and cooked into a pudding. At Ember Yard, we tried several methods and types of chocolate but found that those with a cocoa content of 70% or more works best. I’ve used pistols (buttons) as they are all the same size, so they absorb the smoke evenly. It’s imperative that you leave the chocolate for 24 hours after smoking to allow the flavours to settle and balance.' Ben Tish

Smoked bitter chocolate

Makes about 250g (9oz)

250g (9oz) bitter chocolate (at least 70% cocoa) buttons, or a block cut into small, even-sized chunks
You’ll also need a cold-smoking device and some oak wood dust

Set up the cold-smoking device in the barbecue with the wood dust and get it going.

Place the chocolate in a single layer on a baking sheet. Transfer to the barbecue, then close the lid and vent and cold-smoke the chocolate for 45 minutes. Transfer the chocolate to a container, seal and leave for24 hours before using.

Read more from the July issue:

Featured
Jul 25, 2016
Escape: Sand, sea, surf
Jul 25, 2016
Jul 25, 2016
Jul 19, 2016
The Simple Things letterpress print
Jul 19, 2016
Jul 19, 2016
Jul 15, 2016
Dogs in blankets with Laughing Dog
Jul 15, 2016
Jul 15, 2016

More Gathering recipes:

Featured
Orange Galettes Cathy Pyle.jpg
Aug 9, 2020
Recipe | Orange and Cardamom Galettes
Aug 9, 2020
Aug 9, 2020
R&C jellies Photo Jonathan Cherry Recipe Bex Long.jpg
Mar 14, 2020
Recipe | rhubarb jelly and custard pots
Mar 14, 2020
Mar 14, 2020
Banoffee pie Catherine Frawley.JPG
Feb 12, 2020
Recipe | Banoffee pie
Feb 12, 2020
Feb 12, 2020
  Buy ,  download  or  subscribe   See the sample of our latest issue  here   Buy a copy of our latest anthology:  A Year of Celebrations   Buy a copy of  Flourish 2 , our wellbeing bookazine  Listen to  our podcast  - Small Ways to Live Well

Get hold of your copy of this month's The Simple Things - buy, download or subscribe

View the sampler here

In Eating, Gathering Tags issue 49, chocolate, pudding, gathering, barbecue
Comment
Recipe: Lia Leendertz, photography: Kirstie Young

Recipe: Lia Leendertz, photography: Kirstie Young

Recipe: Lavender lemonade

Lottie Storey June 13, 2016

A refreshing, sweetly herbal fizzy drink for the moment the lavender is at its most fragrant, just as the flowers are starting to open. Add a shot of gin for an adult version.

Makes 6 glasses

500ml water
200g caster sugar
10 lavender flower heads, plus more for decoration
12 lemons
fizzy water

1 Place the water, sugar and lavender flowers into a saucepan and heat gently until the sugar dissolves. Simmer very gently for ten minutes, before removing from the heat and leaving to cool completely. Transfer to a jug or jar, lavender flowers and all, and chill.

2 When you are ready to serve, squeeze the lemons into a jug, tip in the lavender syrup and top up with fizzy water, aiming for about a third of each ingredient. Serve over ice with a lavender stalk and a piece of lemon. 

For more of Lia Leendertz's Seed to Stove midsummer menu, including Gravadlax with dill yoghurt and crispbreads, Latvian midsummer cheese, and Strawberry, apricot and cherry shortcake, turn to page 24 of June's The Simple Things.


More from the June issue:

Featured
Jun 19, 2016
Don't mind that roses have thorns, be glad that thorns have roses
Jun 19, 2016
Jun 19, 2016
Jun 13, 2016
Recipe: Lavender lemonade
Jun 13, 2016
Jun 13, 2016
Jun 8, 2016
Gardening: Make your own organic fertiliser
Jun 8, 2016
Jun 8, 2016


Read more Seed to Stove recipes:

Featured
sun bread.jpg
Dec 21, 2021
Bake: sun bread for Yule
Dec 21, 2021
Dec 21, 2021
May 2, 2021
Recipe: Wild garlic bannocks with asparagus pesto
May 2, 2021
May 2, 2021
Jul 25, 2020
Recipe: Deep-fried courgette flowers with broad bean, pea and mint puree and basil pesto
Jul 25, 2020
Jul 25, 2020
  Buy ,  download  or  subscribe   See the sample of our latest issue  here   Buy a copy of our latest anthology:  A Year of Celebrations   Buy a copy of  Flourish 2 , our wellbeing bookazine  Listen to  our podcast  - Small Ways to Live Well

Get hold of your copy of this month's The Simple Things - buy, download or subscribe

View the sampler here

In Eating, Growing Tags seed to stove, issue 48, june, lemonade, drink, recipe, lavender
Comment

Recipe: Cherry pie

Lottie Storey June 2, 2016

‘No one does fruit pies quite like our cousins across the pond. When I lived in North America, I ate more than my fair share of pie. I couldn’t pass a bakery or coffee shop without being lured in by golden sugared crusts spilling with bubbling, sweet fruit fillings. This is my version of the ubiquitous cherry pie. I use a small heart- shaped cookie cutter to make holes in the top crust, and it always goes down a storm. Eat it for afters with a mug of ‘joe’, like in Twin Peaks.’ - Rosie Birkett

Cherry pie

SERVES 8

for the pastry
2 tbsp granulated sugar
260g plain flour, plus extra for dusting
40g ground almonds pinch of salt
180g cold unsalted butter, cut into cubes
1 large egg, beaten
1 tbsp demerara sugar, for sprinkling

for the filling
100g good-quality black cherry jam
1 tbsp cherry brandy, kirsch or amaretto (optional)
1⁄2 tsp grated nutmeg
1⁄2 tsp vanilla extract
1 tbsp cornflour, mixed to a paste with 2 tsp cold water
500g fresh black or red cherries, pitted and halved

1 For the pastry, put the sugar, flour, ground almonds, salt and butter in a food processor, and blitz until it resembles fine breadcrumbs. With the motor running, add 3 tbsp of the egg and 2 tbsp of ice-cold water, and pulse until the mixture starts to clump together into a dough.
2 Divide the dough into two, flatten each portion into discs, wrap each disc in cling film and chill in the fridge for at least 1 hour.
3 Preheat the oven to 200C/Fan 180C/400F and grease a 24cm pie dish. Remove a disc of pastry from the fridge, unwrap it and roll it out on a floured work surface to 3mm thick and about 2cm wider than the dish. Transfer to a floured baking sheet and chill for 10 minutes. Repeat this with the remaining disc of pastry.
4 Heat the jam for the filling in a saucepan with 100ml water, the alcohol (if using), nutmeg and the vanilla extract. When it’s all melted together, add the diluted cornflour, and stir together until smooth and thickened. Add the cherries and gently coat them in the mixture, being careful not to mush them up. Remove from the heat and set aside. 
5 Using a floured rolling pin, transfer one of the chilled pastry sheets to the greased pie dish and drape it across
the dish. Let it sink into the dish, and, holding on to the edges, lift and tuck the pastry into the edges of the dish, all the way round, to line it. Trim off any excess pastry, and lightly prick the base with a fork. Fill the dish with the cherry filling. Use a pastry cutter to cut holes in the remaining pastry sheet, covering an area just smaller than the diameter of the pie dish, leaving a large border intact. Place it
over the pie filling, and fold the edge of the top crust over the edge of the bottom crust, crimping it together with your fingers to seal.
6 Brush the pastry with the remains of the beaten egg and sprinkle over the demerara sugar. Bake for 20 minutes, until the crust is golden, and then reduce the oven temperature to 180C/Fan 160C/350F, covering the top of the pastry with foil if need be, and bake for a further 35–40 minutes, until the filling is bubbling and the pastry is golden and firm. Allow to cool and serve with cream.

Rosie Birkett is a food writer, food stylist and home cook living in Hackney, east London. Her book, A Lot On Her Plate (Hardie Grant) speaks of her love of a good meal and enthusiasm for food generally.


Read more from the June issue:

Featured
Jun 19, 2016
Don't mind that roses have thorns, be glad that thorns have roses
Jun 19, 2016
Jun 19, 2016
Jun 13, 2016
Recipe: Lavender lemonade
Jun 13, 2016
Jun 13, 2016
Jun 8, 2016
Gardening: Make your own organic fertiliser
Jun 8, 2016
Jun 8, 2016

More recipe posts:

Featured
Orange Galettes Cathy Pyle.jpg
Aug 9, 2020
Recipe | Orange and Cardamom Galettes
Aug 9, 2020
Aug 9, 2020
R&C jellies Photo Jonathan Cherry Recipe Bex Long.jpg
Mar 14, 2020
Recipe | rhubarb jelly and custard pots
Mar 14, 2020
Mar 14, 2020
Banoffee pie Catherine Frawley.JPG
Feb 12, 2020
Recipe | Banoffee pie
Feb 12, 2020
Feb 12, 2020
  Buy ,  download  or  subscribe   See the sample of our latest issue  here   Buy a copy of our latest anthology:  A Year of Celebrations   Buy a copy of  Flourish 2 , our wellbeing bookazine  Listen to  our podcast  - Small Ways to Live Well

Get hold of your copy of this month's The Simple Things - buy, download or subscribe

View the sampler here

In Gathering, Eating Tags issue 48, june, gathering, cherries, cherry pie, pie, pastry
Comment

Recipe: Strawberry and thyme pie

Lottie Storey May 23, 2016

June means sunshine and strawberries. This eye-catching pudding oozes natural berry sweetness and could happily accompany you on a weekend picnic or take centre stage at a midsummer soirée. Strawberries and thyme are good friends and the addition of the herb adds an interesting twist to the simple flavour.  

Strawberry and thyme pie

Serves 8

for the dough
125g plain flour
125g almond flour (or use 250g plain flour in total)
125g butter
pinch of salt
30g icing sugar
cold water, as needed

for the thyme custard
200ml milk
seeds of 1 vanilla pod
a few sprigs fresh thyme
2 egg yolks
30g icing sugar
150g cream cheese

for the topping
500-600g strawberries
fresh thyme leaves 

Make the dough: Work both flours, butter, salt and icing sugar into a smooth dough. If dough is too dry, add a few drops of cold water. Shape into a flat disc and wrap in cling film. Rest in fridge for 1 hour.

Start the thyme custard: Bring the milk to a near boil with vanilla and thyme. Turn off heat and let steep until ready to use.

1 Preheat oven to 180C/Fan 160/350F.

2 Dust countertop with flour and pat dough into a thin slab that fits a 22cm pie plate or a pie pan with a removable bottom. Grease the pan and line it with the dough. Leave some overhanging the edge. Carefully press a sheet of parchment paper onto the dough, fill with baking beans and blind bake the crust for 15 mins. Use the parchment paper to lift out the beans. Bake crust for 10 mins more.

3 Let crust cool, then neatly trim the edges. Keep the oven on.

4 Return to the custard. Beat the yolks and icing sugar until light and frothy. Pour into the warm milk through a strainer. Whisk it all and pour back into the pan. While stirring, bring mixture to a near boil and reduce it slightly over low heat. Turn off heat and beat in the cream cheese. Pour the mix into the blind-baked crust and put the pie back in the oven for 15 mins.

5 Allow the pie to cool on a rack for at least 30 mins.

6 Quarter the strawberries and use them to dress the pie.

7 Serve garnished with thyme. 

From Home Baked by Yvette van Boven (Stewart, Tabori & Chang) 


Read more from the June issue:

Featured
Jun 19, 2016
Don't mind that roses have thorns, be glad that thorns have roses
Jun 19, 2016
Jun 19, 2016
Jun 13, 2016
Recipe: Lavender lemonade
Jun 13, 2016
Jun 13, 2016
Jun 8, 2016
Gardening: Make your own organic fertiliser
Jun 8, 2016
Jun 8, 2016

More strawberry recipes:

Featured
Petal sandwiches Kirstie Young.jpg
Jun 5, 2021
Make | Sweet & Silly Sandwiches
Jun 5, 2021
Jun 5, 2021
SIM72.GATHERING_ST Midsummer Jun18_16.JPG
Jun 12, 2018
Recipe | Summer strawberry tart
Jun 12, 2018
Jun 12, 2018
May 23, 2016
Recipe: Strawberry and thyme pie
May 23, 2016
May 23, 2016
  Buy ,  download  or  subscribe   See the sample of our latest issue  here   Buy a copy of our latest anthology:  A Year of Celebrations   Buy a copy of  Flourish 2 , our wellbeing bookazine  Listen to  our podcast  - Small Ways to Live Well

Get hold of your copy of this month's The Simple Things - buy, download or subscribe

View the sampler here

In Eating Tags issue 48, june, strawberry, recipe, cake, summer, pastry
Comment

Recipe: Guacamole

Lottie Storey May 18, 2016

Guacamole is an authentic accompaniment to the tacos on page 38 of June's The Simple Things. The rest of the menu? Baby potato and rosemary pizzas, Bagna càuda Melting pork tacos, Cumin and garlic black beans, Cherry pie...

Guacamole

1 tomato, finely chopped
2 ripe avocados, stoned and chopped
1 garlic clove, crushed with ½ tsp sea salt
½ red onion, finely chopped
salt and freshly ground black pepper
1 green chilli, deseeded and finely chopped
15g coriander, leaves and stems chopped, and some leaves reserved for garnish
juice of ½ lime

Put the tomato, avocado, garlic and onion in a bowl and mash together with a fork. Season with sea salt and pepper, then add the chilli, coriander and lime juice and incorporate. Taste for seasoning and garnish with coriander leaves.

Note: If you’re making the guacamole in advance, pop the avocado stone into the bowl with the guacamole and cover with cling film (plastic wrap) to stop it from going brown.

Read more from the June issue:

Featured
Jun 19, 2016
Don't mind that roses have thorns, be glad that thorns have roses
Jun 19, 2016
Jun 19, 2016
Jun 13, 2016
Recipe: Lavender lemonade
Jun 13, 2016
Jun 13, 2016
Jun 8, 2016
Gardening: Make your own organic fertiliser
Jun 8, 2016
Jun 8, 2016
  Buy ,  download  or  subscribe   See the sample of our latest issue  here   Buy a copy of our latest anthology:  A Year of Celebrations   Buy a copy of  Flourish 2 , our wellbeing bookazine  Listen to  our podcast  - Small Ways to Live Well

Get hold of your copy of this month's The Simple Things - buy, download or subscribe

View the sampler here

In Eating, Gathering Tags issue 48, june, guacamole, avocado, mexican, midsummer
Comment

Recipe: Honeycomb (for the chocolate honeycomb biscuit cake)

Lottie Storey May 18, 2016

Real honeycomb

Makes about 150g

2tbsp honey
2tbsp golden syrup
100g caster sugar
1 heaped tsp bicarbonate of soda

Line a small baking tray with baking parchment. In a heavy bottomed, deep-sided saucepan (you need to allow room for the mixture to bubble up), combine the honey, golden syrup and caster sugar over a low heat, stirring a couple of times until the sugar has dissolved. Turn up the heat, bring to the boil and continue to cook until the mixture turns amber in colour. There’s no need to use a thermometer here, but if you want to check, it should read 150C.

Remove from the heat and add the bicarbonate of soda: the mixture will bubble ferociously. Whisk quickly to combine – about 5 seconds – but don’t overdo it or the bubbles will start to collapse in on themselves. Pour onto the prepared tray and leave to set at room temperature. Once set bash your honeycomb into bite-sized pieces. It will keep in an airtight container for several days. 

Turn to page 55 of June's The Simple Things for the recipe for Chocolate honeycomb biscuit cake.


Read more from the June issue:

Featured
Jun 19, 2016
Don't mind that roses have thorns, be glad that thorns have roses
Jun 19, 2016
Jun 19, 2016
Jun 13, 2016
Recipe: Lavender lemonade
Jun 13, 2016
Jun 13, 2016
Jun 8, 2016
Gardening: Make your own organic fertiliser
Jun 8, 2016
Jun 8, 2016
  Buy ,  download  or  subscribe   See the sample of our latest issue  here   Buy a copy of our latest anthology:  A Year of Celebrations   Buy a copy of  Flourish 2 , our wellbeing bookazine  Listen to  our podcast  - Small Ways to Live Well

Get hold of your copy of this month's The Simple Things - buy, download or subscribe

View the sampler here

In Eating Tags honeycomb, cake, cake recipe, issue 48, june
Comment
  • Blog
  • Older
  • Newer
Featured
  Buy ,  download  or  subscribe   See the sample of our latest issue  here   Buy a copy of our latest anthology:  A Year of Celebrations   Buy a copy of  Flourish 2 , our wellbeing bookazine  Listen to  our podcast  - Small Ways to Live Well
Feb 27, 2025
Feb 27, 2025

Buy, download or subscribe

See the sample of our latest issue here

Buy a copy of our latest anthology: A Year of Celebrations

Buy a copy of Flourish 2, our wellbeing bookazine

Listen to our podcast - Small Ways to Live Well

Feb 27, 2025
Join our Newsletter
Name
Email *

We respect your privacy and won't share your data.

email marketing by activecampaign
facebook-unauth twitter pinterest spotify instagram
  • Subscriber Login
  • Stockists
  • Advertise
  • Contact

The Simple Things is published by Iceberg Press

The Simple Things

Taking time to live well

We celebrate slowing down, enjoying what you have, making the most of where you live, enjoying the company of of friends and family, and feeding them well. We like to grow some of our own vegetables, visit local markets, rummage for vintage finds, and decorate our home with the plunder. We love being outdoors and enjoy the satisfaction that comes with a job well done.

facebook-unauth twitter pinterest spotify instagram